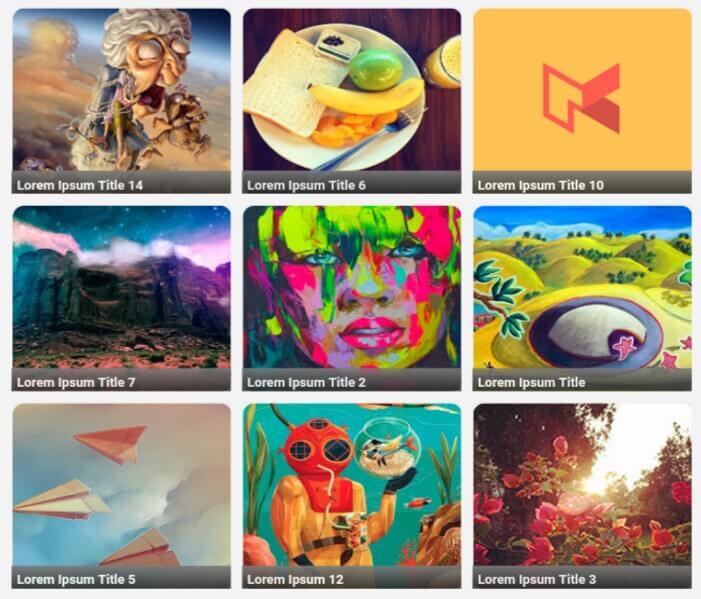
Wanna display Blogger Post In grid view with Thumbnails.
If yes then you are at perfect place. Today we will discuss on it.
In most blogs there a homepage full of blog posts with list style. Visitors have to scroll to go to down. So, if you want to give your visitors a good experience on your blog you should use blogs posts with Grid view.
Grid View is a script for blogger blog which will display Blogger blog post in Grid style with Thumbnails in homepage and archive pages. This is best for blogs with videos and wallpapers. Before proceeding to the steps for adding grid view, take a look at the demo.
Live Demo
I hope you have satisfied with the demo. And if you want to display Blogger posts in grid view with Thumbnails in your blog then follow the next steps.
Step 1: Login to your Blogger Dashboard.
Step 2: Go to Template >> Edit HTML.
Step 3: Click anywhere inside the code area and press Ctrl + F to open the search box.
Step 4: After that search for the </head> tag.
Step 5: When you find the code just above </head> code paste the code given below:
Customization:-
Last Words
Now your posts will start displaying in grid view with Thumbnails. I hope you liked this post. Comment down your problems and share this post with your friend. For more stay tuned with us...
If yes then you are at perfect place. Today we will discuss on it.
In most blogs there a homepage full of blog posts with list style. Visitors have to scroll to go to down. So, if you want to give your visitors a good experience on your blog you should use blogs posts with Grid view.
Grid View is a script for blogger blog which will display Blogger blog post in Grid style with Thumbnails in homepage and archive pages. This is best for blogs with videos and wallpapers. Before proceeding to the steps for adding grid view, take a look at the demo.
Live Demo
I hope you have satisfied with the demo. And if you want to display Blogger posts in grid view with Thumbnails in your blog then follow the next steps.
Display Blogger Posts With Grid View With Thumbnails
Step 1: Login to your Blogger Dashboard.
Step 2: Go to Template >> Edit HTML.
Step 3: Click anywhere inside the code area and press Ctrl + F to open the search box.
Step 4: After that search for the </head> tag.
Step 5: When you find the code just above </head> code paste the code given below:
<script src='http://code.jquery.com/jquery-1.9.1.js'/>
<b:if cond='data:blog.pageType != "item"'><b:if cond='data:blog.pageType != "static_page"'>
<script type='text/javascript'>//<![CDATA[
function hideLightbox(){for(var a=document.getElementsByTagName("img"),b=0;b<a.length;++b)a[b].onmouseover=function(){var a=this.parentNode.innerHTML;this.parentNode.innerHTML=a,this.onmouseover=null}}$(document).ready(function(){var a=200,b=170,c="https://blogger.googleusercontent.com/img/b/R29vZ2xl/AVvXsEjZZZ7jIFQ_AdMoGzVY295a_MPVY0CNgHxmSzqxm2AIhEoqA2_Oq-AefGpcabCs31g5ZB4EvQ4wl3-TZdagI6OFv1gef7it8crp4RmLpzPblNPcEyFGOq-WwaEVYEgGKiZEsxAaG9ars7o/w500-c-h330/no-thumb.png",d=1;$(".post-body").each(function(e,f){var f=$(f),g=$(f).find("img").first(),h=f.parent().find("h3 a"),i=h.attr("href"),j=h.text();if($(h).remove(),f.empty(),g.attr("src")){var k=g.attr("height"),l=g.attr("width"),m=$(g).parent();if(f.append(m),d)g.attr({src:g.attr("src").replace(/s\B\d{3,4}/,"w500-h330-c")}),g.removeAttr("width").removeAttr("height");else{g.attr({src:g.attr("src").replace(/s\B\d{3,4}/,"s"+a)}),g.removeAttr("width");var n=(k/l*a).toFixed(0);g.attr("height",n)}}else var g=$("<img>").attr("src",c),m=$("<a>").append(g).appendTo(f);m.attr("href",i).css("clear","none").css("margin-left","0").css("margin-right","0").addClass("postThumbnail");var o=$("<div>").prepend(j).css("opacity","0.9").css("filter","alpha(opacity=0.9)").appendTo(m);o.height();o.css("margin-top","-28px"),f.css("height",b).css("overflow","hidden")}),$("#blog-pager").css("clear","both")}),window.addEventListener?window.addEventListener("load",hideLightbox,void 0):window.attachEvent("onload",hideLightbox);
//]]>
</script>
<style type='text/css'>
.post {
width:31.3%;
float:left;
display:inline-block;
border-bottom: medium none;
margin: 0 1% 2%;
padding-bottom: 0;
}
h2.date-header,.post-footer {
display: none;
}
h3.post-title, .comments h4,.post-header{margin:0;}
.postThumbnail:hover {text-decoration:none;}
a.postThumbnail div {
text-decoration: none;
color: #fff;
padding:0 5px;
height:24px;
font:bold 12px/25px "Trebuchet MS",Trebuchet,Verdana,sans-serif;
text-transform: capitalize;
background: rgb(125,126,125);
background: -moz-linear-gradient(top, rgba(125,126,125,1) 0%, rgba(14,14,14,1) 100%);
background: -webkit-gradient(linear, left top, left bottom, color-stop(0%,rgba(125,126,125,1)), color-stop(100%,rgba(14,14,14,1)));
background: -webkit-linear-gradient(top, rgba(125,126,125,1) 0%,rgba(14,14,14,1) 100%);
background: -o-linear-gradient(top, rgba(125,126,125,1) 0%,rgba(14,14,14,1) 100%);
background: -ms-linear-gradient(top, rgba(125,126,125,1) 0%,rgba(14,14,14,1) 100%);
background: linear-gradient(to bottom, rgba(125,126,125,1) 0%,rgba(14,14,14,1) 100%);
filter:progid:DXImageTransform.Microsoft.gradient(startColorstr='#7d7e7d',endColorstr='#0e0e0e',GradientType=0 );
}
.postThumbnail{width:100%;}
.postThumbnail:hover div {
display: block;
}
.postThumbnail img {
width:100%;
background-color: transparent;
border: medium none;
padding: 0px;
-webkit-border-radius: 12px;
-moz-border-radius: 12px;
border-radius: 12px;
transition: opacity .25s ease-in-out;
-moz-transition: opacity .25s ease-in-out;
-webkit-transition: opacity .25s ease-in-out;
}
.postThumbnail img:hover {
-ms-filter: "progid: DXImageTransform.Microsoft.Alpha(Opacity=70)";
filter: alpha(opacity=70);
-moz-opacity: 0.7;
-khtml-opacity: 0.7;
opacity: 0.7;
}
</style>
</b:if></b:if>
Customization:-
- To change the width of the image replace 200 with your own size.
- To change the height of image replace 170 with your own size.
- To change default image, when there is no image then replace the link highlighted in red.
Last Words
Now your posts will start displaying in grid view with Thumbnails. I hope you liked this post. Comment down your problems and share this post with your friend. For more stay tuned with us...


Post a Comment